Building a simple DICOM application with C++ and DCMTK, in Visual Studio 2019
This guide assumes that the development environment has already been configured, so before you continue you need to configure it by following this other guide configure dcmtk with cmake for development in c++ and visual studio 2019
Without this configuration, none of the following can be done. Also, in this guide I will use the TestDCMTK project created in the Configuration Guide.
The objective of this guide is to build a small sample application that will serve as an introduction to programming using the DCMTK library. This example will consist of a console application, which will create a DICOM file with certain data and a test image. The information necessary to implement this application can be found in the DCMTK documentation and in the img2dcm command code.
At the end of this guide you will find all the code of the application to be built.
In Visual Studio, “Console App” projects are created with a .cpp file where you write the code to run. Therefore the TestDCMTK project created earlier as a “Console App”, has a TestDCMTK file.cpp where the application will be programmed using the DCMTK library.
For the functionalities specified above, it is necessary to include the following:
#include <iostream>
#include "dcmtk/config/osconfig.h"
#include "dcmtk/dcmdata/dcfilefo.h"
#include "dcmtk/dcmdata/libi2d/i2d.h"
#include "dcmtk/dcmdata/libi2d/i2djpgs.h"
#include "dcmtk/dcmdata/libi2d/i2dplsc.h"
#include "dcmtk/dcmdata/dctk.h"using namespace std;
DCMTK has many functionalities that are specified in the documentation. However, in order to use them, they have to be included/imported as previously done to make use of the classes and functionalities for the management of DICOM data structures, and for image to DICOM conversion.
After this, inside the function we will create and initialize the variables to be used:
char uid[100];
I2DImgSource* inputPlug = new I2DJpegSource();
I2DOutputPlug* outPlug = new I2DOutputPlugSC();
Image2Dcm i2d;
E_TransferSyntax writeXfer;
DcmDataset* resultDset = NULL;
They can be given any name, as long as they are used properly.
- uid will be used to generate a uid for the SOP instance.
- inputPlug is of type I2DJpegSource, which is an I2DImgSource implementation for parsing JPEG images and converting them into DICOM files.
- outPlug is of type I2DOutputPlugSC,which implements image-to-DICOM file conversion.
- i2d is a variable of type Image2Dcm,in which the utilities to convert from image to DICOM file are implemented.
- writeXfer is a variable of type E_TransferSyntax,which consists of an enumerator of all the DICOM transfer syntaxes known to the toolset.
- resultDset is a variable of type DcmDataset, which is a class that handles the DICOM data set format.
Once this is done we will set the input image to be read using inputPlug and then perform the image conversion to DICOM using the i2d convert function, to which the following is passed for the input parameters:
- inputPlug with the image to convert.
- outPlug to perform the conversion.
While by the output parameters the following is passed to it:
- resultDset to store the resulting DICOM object.
- writeXfer to save the transfer syntax.
Then, for this example the resulting code would be:
inputPlug->setImageFile("test.jpg");
i2d.convert(inputPlug, outPlug, resultDset, writeXfer);
After this, the resultDset object would consist of a DICOM object without but with an image. This object of type DcmDataset provides certain functions for setting the data in it. Using these same functions, the patient’s name, the SOP class identifier, and the SOP instance identifier will be established with test data:
resultDset->putAndInsertString(DCM_PatientName, "Brandon Lara");
resultDset->putAndInsertString(DCM_SOPClassUID, UID_SecondaryCaptureImageStorage);
resultDset->putAndInsertString(DCM_SOPInstanceUID, dcmGenerateUniqueIdentifier(uid, SITE_INSTANCE_UID_ROOT));
In the first parameter you specify which data is going to be edited, you can specify it directly or use the DCMTK tags. In my opinion I think it is more readable to use the tags.
In the second parameter you enter the new value that the data passed by the first parameter will have.
Finally, resultDset will be saved as a DICOM file (.dcm) in the project folder. For this it is necessary to create a DcmFileFormat with this resultDset in order to save it using the save function of DcmFileFormat.
Thus, the code would look like this:
DcmFileFormat dcmff(resultDset);
dcmff.saveFile("test.dcm", writeXfer, EET_ExplicitLength, EGL_recalcGL, EPD_noChange, OFstatic_cast(Uint32, 0), OFstatic_cast(Uint32, 0), EWM_fileformat);
As you can see in the first parameter, the data is saved in the file “test.dcm”, while the rest of the parameters have been set in the same way as done in the code of the command img2dcm.
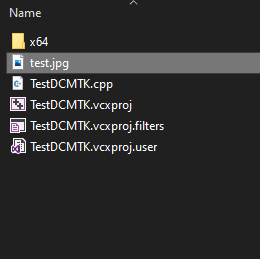
Before executing all this code, in the project folder containing the .cpp file, you have to put the test image to be converted to DICOM file (In my case test.jpg):
Then we run the TestDCMTK project using Visual Studio:
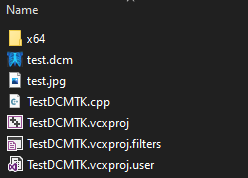
If everything went well, you should have created the test.dcm file in the project folder containing the .cpp file and where the test image was placed.
The data in this file can be displayed with the DCMTK console utilities, by programming C++ code using the libraries, or by using a DICOM Viewer.
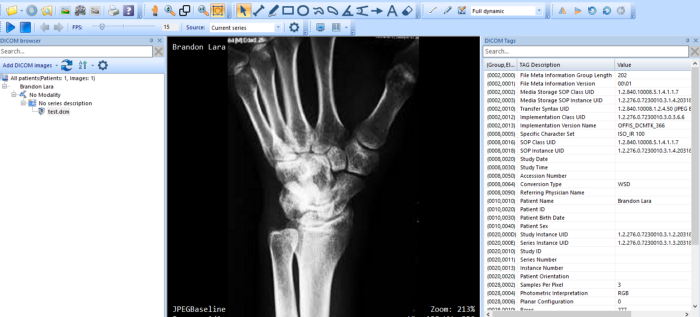
- Using MicroDicom you can see that everything has been set correctly:
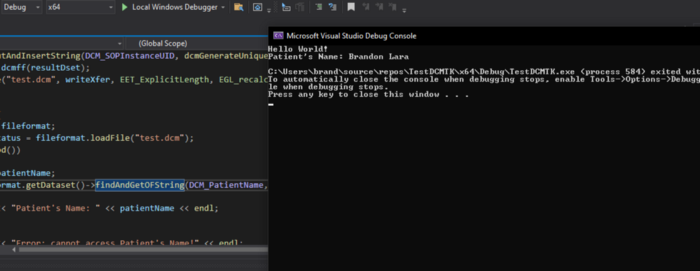
- Using the DCMTK libraries we can write the following code to display the patient’s name on the console:
In my case, the result of executing this code is:

As I said at the beginning of this guide, here is all the code of the application that has been built for this guide:
I hope that this guide has served to facilitate the introduction to programming through this library, any doubt or suggestion you can tell me without problem, I will always try to answer :)